This document provides a quick guide for carriers and vendors on how to schedule an appointment using the One Network system.
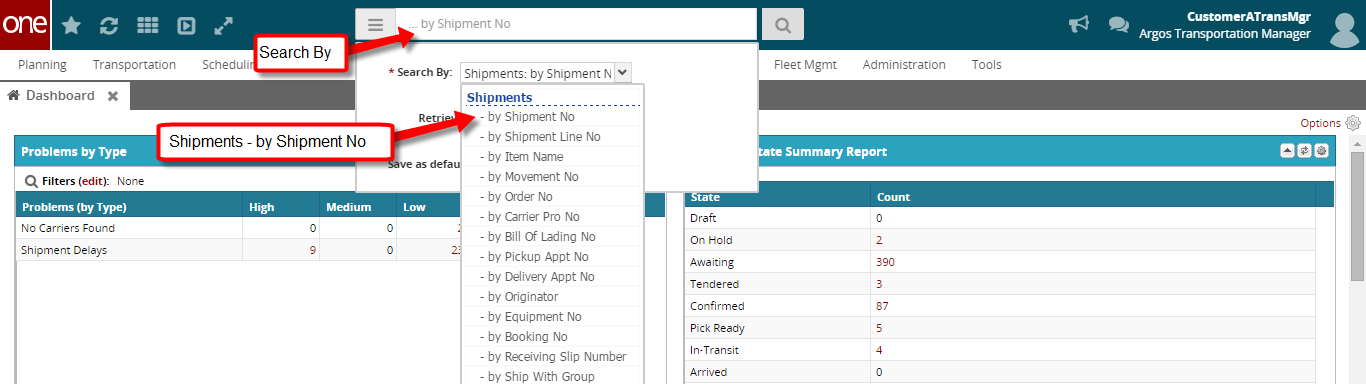
A Search By field and a Retrieve For field appears.
• For the Search By field, make sure that you set "Shipments: by Shipment Number".
• For the Retrieve For field, the default choice is "Last 30 Days". To look for shipments whose pickup date is older than 30 days, select one of the other choices from the drop-down list.

If there are no appointment times available in the system, the page shows " no data ". If this happens, please contact your hub to request an appointment.
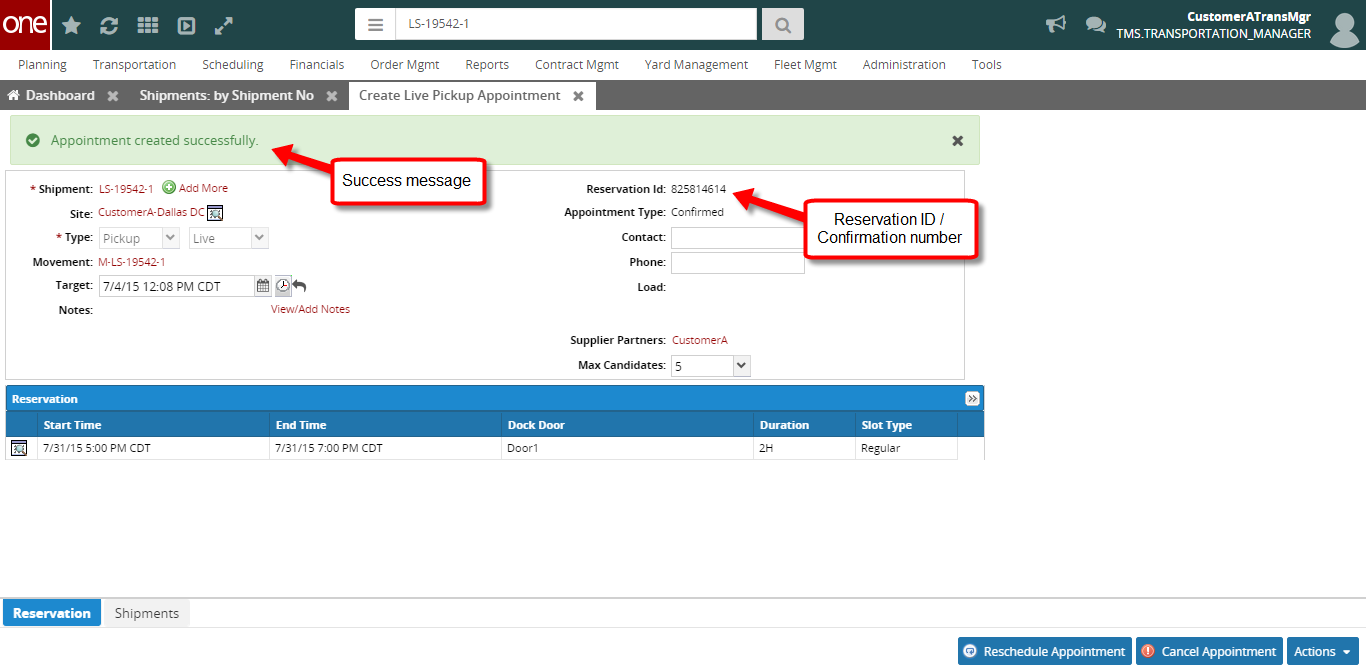
A success message appears on the Appointment page along with the Reservation ID (confirmation number).
This confirms that the appointment has been scheduled successfully.
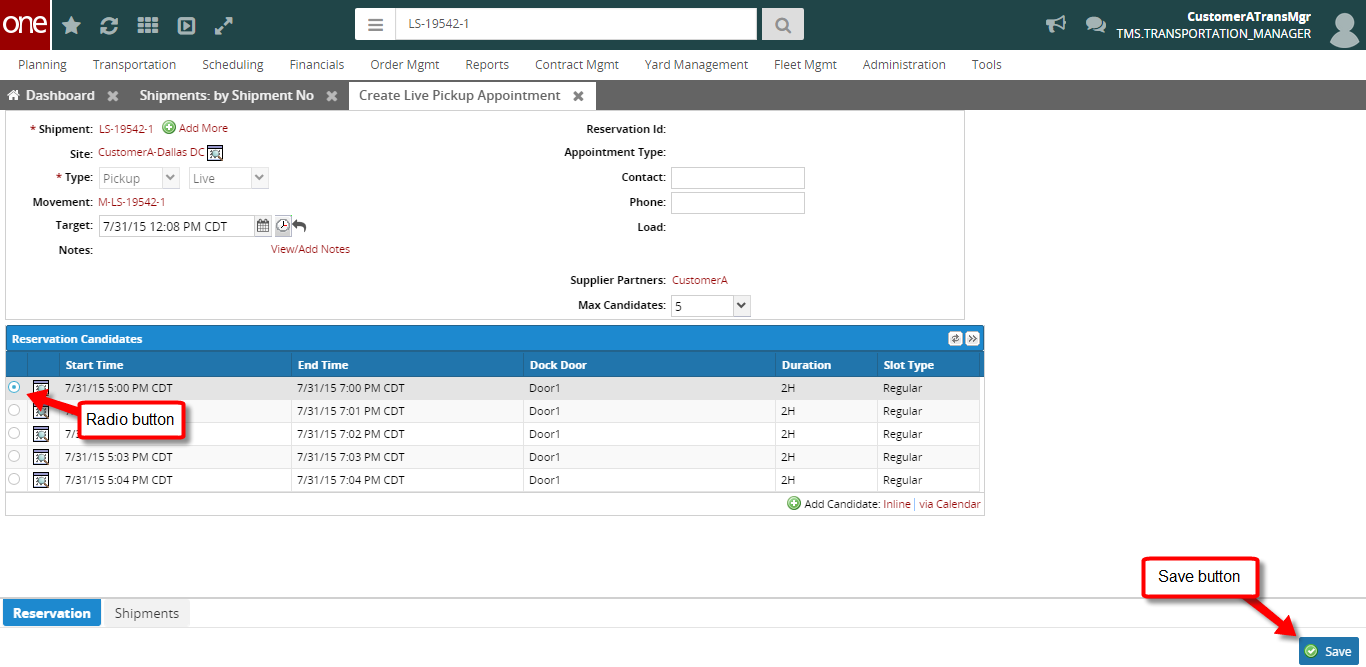
When first scheduling the appointment, to find the available appointments for a different day and/or time, change the date and/or time in the Target field, then click outside of this field or click the Get Candidates icon. The list of appointments is refreshed based on this new date and time. To change the " Target " field back to its original date and time, click the Reset Target Date icon.

